The Win32 templates have been renamed to Windows Desktop.
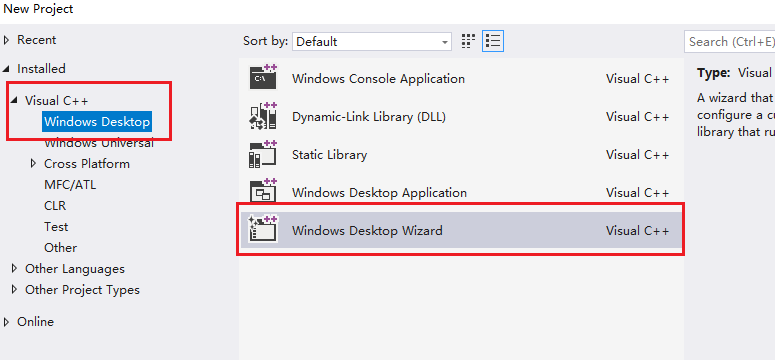
In VS2017, If you want to create the Win32 Console Application,I suggest you could choose File->New->Project. And then choose Windows Desktop Wizard.As shown below:
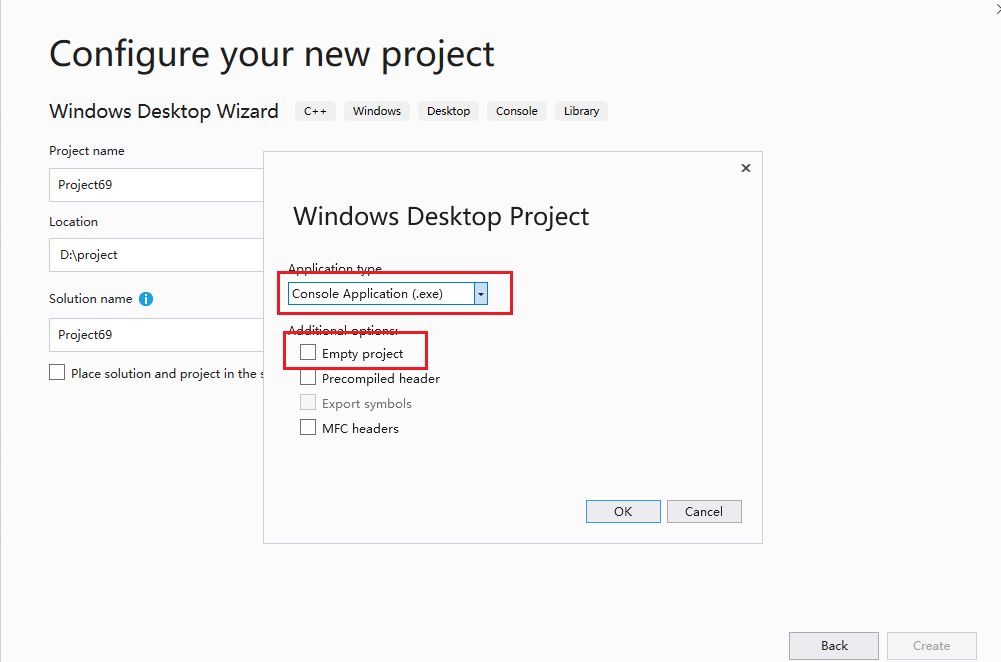
If you want to create Win32 Console Application, you could select Console Application(.exe) in Application type. If you want to create the Empty Project, you could check Empty Project

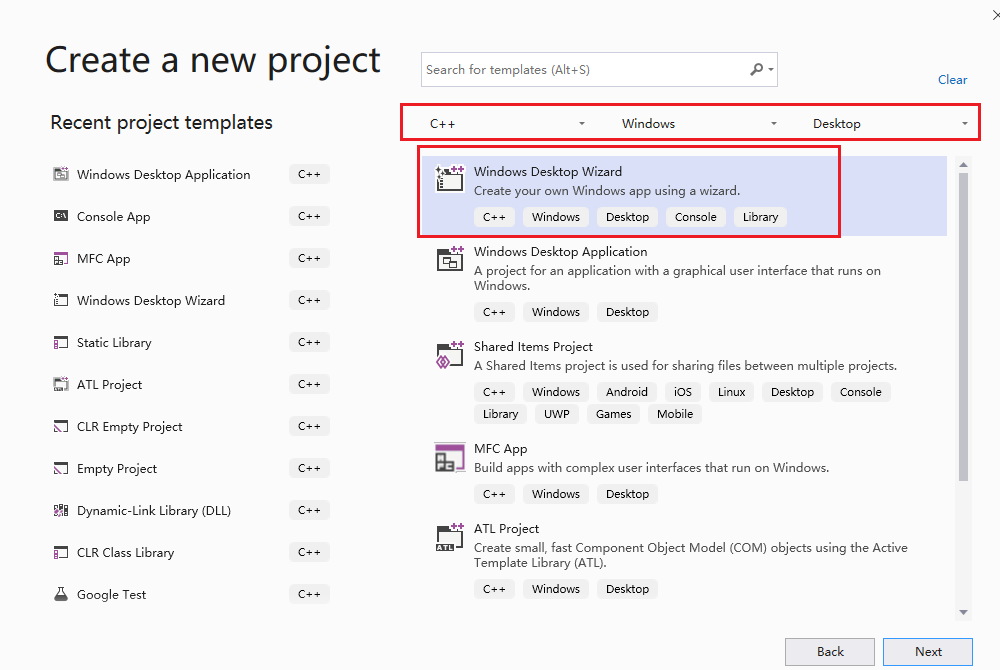
In vs2019, if you want to create a Win32 console application, the steps are similar to in vs2017: 1,From the main menu, choose File > New > Project to open the Create a New Project dialog box.
2,At the top of the dialog, set Language to C++, set Platform to Windows, and set Project type to Desktop.
3,From the filtered list of project types, choose Windows Desktop Wizard
4,Under Application type, select Desktop application (.exe). Under Additional options, select Empty project.