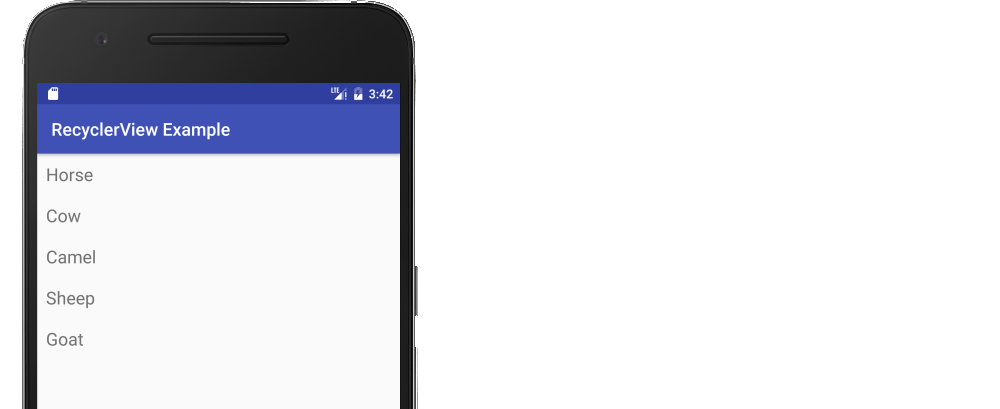
The following is a minimal example that will look like the following image.
Start with an empty activity. You will perform the following tasks to add the RecyclerView. All you need to do is copy and paste the code in each section. Later you can customize it to fit your needs.
- Add dependencies to gradle
- Add the xml layout files for the activity and for the RecyclerView row
- Make the RecyclerView adapter
- Initialize the RecyclerView in your activity
Update Gradle dependencies
Make sure the following dependencies are in your app gradle.build file:
implementation 'com.android.support:appcompat-v7:28.0.0'
implementation 'com.android.support:recyclerview-v7:28.0.0'
You can update the version numbers to whatever is the most current. Use compile rather than implementation if you are still using Android Studio 2.x.
Create activity layout
Add the RecyclerView to your xml layout.
activity_main.xml
<?xml version="1.0" encoding="utf-8"?>
<RelativeLayout
    xmlns:android="http://schemas.android.com/apk/res/android"
    android:layout_width="match_parent"
    android:layout_height="match_parent">

    <android.support.v7.widget.RecyclerView
        android:id="@+id/rvAnimals"
        android:layout_width="match_parent"
        android:layout_height="match_parent"/>

</RelativeLayout>
Create row layout
Each row in our RecyclerView is only going to have a single TextView. Create a new layout resource file.
recyclerview_row.xml
<?xml version="1.0" encoding="utf-8"?>
<LinearLayout
    xmlns:android="http://schemas.android.com/apk/res/android"
    android:layout_width="match_parent"
    android:layout_height="wrap_content"
    android:orientation="horizontal"
    android:padding="10dp">

    <TextView
        android:id="@+id/tvAnimalName"
        android:layout_width="wrap_content"
        android:layout_height="wrap_content"
        android:textSize="20sp"/>

</LinearLayout>
Create the adapter
The RecyclerView needs an adapter to populate the views in each row with your data. Create a new java file.
MyRecyclerViewAdapter.java
public class MyRecyclerViewAdapter extends RecyclerView.Adapter<MyRecyclerViewAdapter.ViewHolder> {

    private List<String> mData;
    private LayoutInflater mInflater;
    private ItemClickListener mClickListener;

    // data is passed into the constructor
    MyRecyclerViewAdapter(Context context, List<String> data) {
        this.mInflater = LayoutInflater.from(context);
        this.mData = data;
    }

    // inflates the row layout from xml when needed
    @Override
    public ViewHolder onCreateViewHolder(ViewGroup parent, int viewType) {
        View view = mInflater.inflate(R.layout.recyclerview_row, parent, false);
        return new ViewHolder(view);
    }

    // binds the data to the TextView in each row
    @Override
    public void onBindViewHolder(ViewHolder holder, int position) {
        String animal = mData.get(position);
        holder.myTextView.setText(animal);
    }

    // total number of rows
    @Override
    public int getItemCount() {
        return mData.size();
    }


    // stores and recycles views as they are scrolled off screen
    public class ViewHolder extends RecyclerView.ViewHolder implements View.OnClickListener {
        TextView myTextView;

        ViewHolder(View itemView) {
            super(itemView);
            myTextView = itemView.findViewById(R.id.tvAnimalName);
            itemView.setOnClickListener(this);
        }

        @Override
        public void onClick(View view) {
            if (mClickListener != null) mClickListener.onItemClick(view, getAdapterPosition());
        }
    }

    // convenience method for getting data at click position
    String getItem(int id) {
        return mData.get(id);
    }

    // allows clicks events to be caught
    void setClickListener(ItemClickListener itemClickListener) {
        this.mClickListener = itemClickListener;
    }

    // parent activity will implement this method to respond to click events
    public interface ItemClickListener {
        void onItemClick(View view, int position);
    }
}
Notes
- Although not strictly necessary, I included the functionality for listening for click events on the rows. This was available in the old
ListViewsand is a common need. You can remove this code if you don’t need it.
Initialize RecyclerView in Activity
Add the following code to your main activity.
MainActivity.java
public class MainActivity extends AppCompatActivity implements MyRecyclerViewAdapter.ItemClickListener {

    MyRecyclerViewAdapter adapter;

    @Override
    protected void onCreate(Bundle savedInstanceState) {
        super.onCreate(savedInstanceState);
        setContentView(R.layout.activity_main);

        // data to populate the RecyclerView with
        ArrayList<String> animalNames = new ArrayList<>();
        animalNames.add("Horse");
        animalNames.add("Cow");
        animalNames.add("Camel");
        animalNames.add("Sheep");
        animalNames.add("Goat");

        // set up the RecyclerView
        RecyclerView recyclerView = findViewById(R.id.rvAnimals);
        recyclerView.setLayoutManager(new LinearLayoutManager(this));
        adapter = new MyRecyclerViewAdapter(this, animalNames);
        adapter.setClickListener(this);
        recyclerView.setAdapter(adapter);
    }

    @Override
    public void onItemClick(View view, int position) {
        Toast.makeText(this, "You clicked " + adapter.getItem(position) + " on row number " + position, Toast.LENGTH_SHORT).show();
    }
}
Notes
- Notice that the activity implements the
ItemClickListenerthat we defined in our adapter. This allows us to handle row click events inonItemClick.
Finished
That’s it. You should be able to run your project now and get something similar to the image at the top.
Going on
Adding a divider between rows
You can add a simple divider like this
DividerItemDecoration dividerItemDecoration = new DividerItemDecoration(recyclerView.getContext(),
    layoutManager.getOrientation());
recyclerView.addItemDecoration(dividerItemDecoration);
If you want something a little more complex, see the following answers:
- How to add dividers and spaces between items in RecyclerView?
- How to indent the divider in a linear layout RecyclerView (ie, add padding, margin, or an inset only to the ItemDecoration)
Changing row color on click
See this answer for how to change the background color and add the Ripple Effect when a row is clicked.
Updating rows
See this answer for how to add, remove, and update rows.